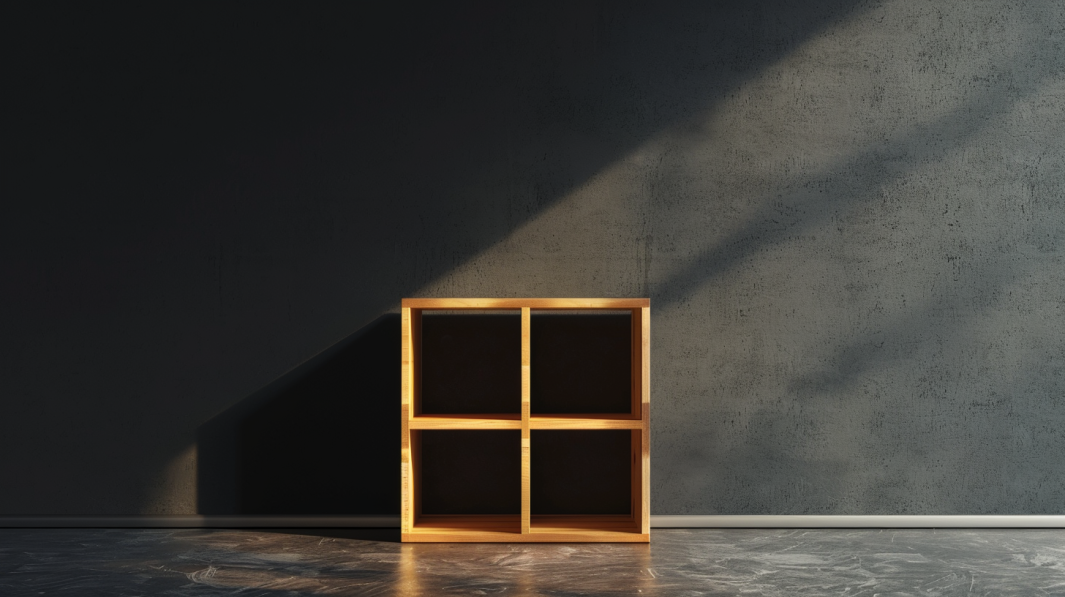
Alright, let’s talk about the one thing that can instantly upgrade your living space and help you store things that you didn’t have enough space for – the cubby cabinet. It sounds fancy, but it’s really just a glorified shelf with compartments.
Still, it can be an awesome storage solution. Before you roll your eyes and think, “Why on earth would I want to build a cubby cabinet?” let me break it down for you.
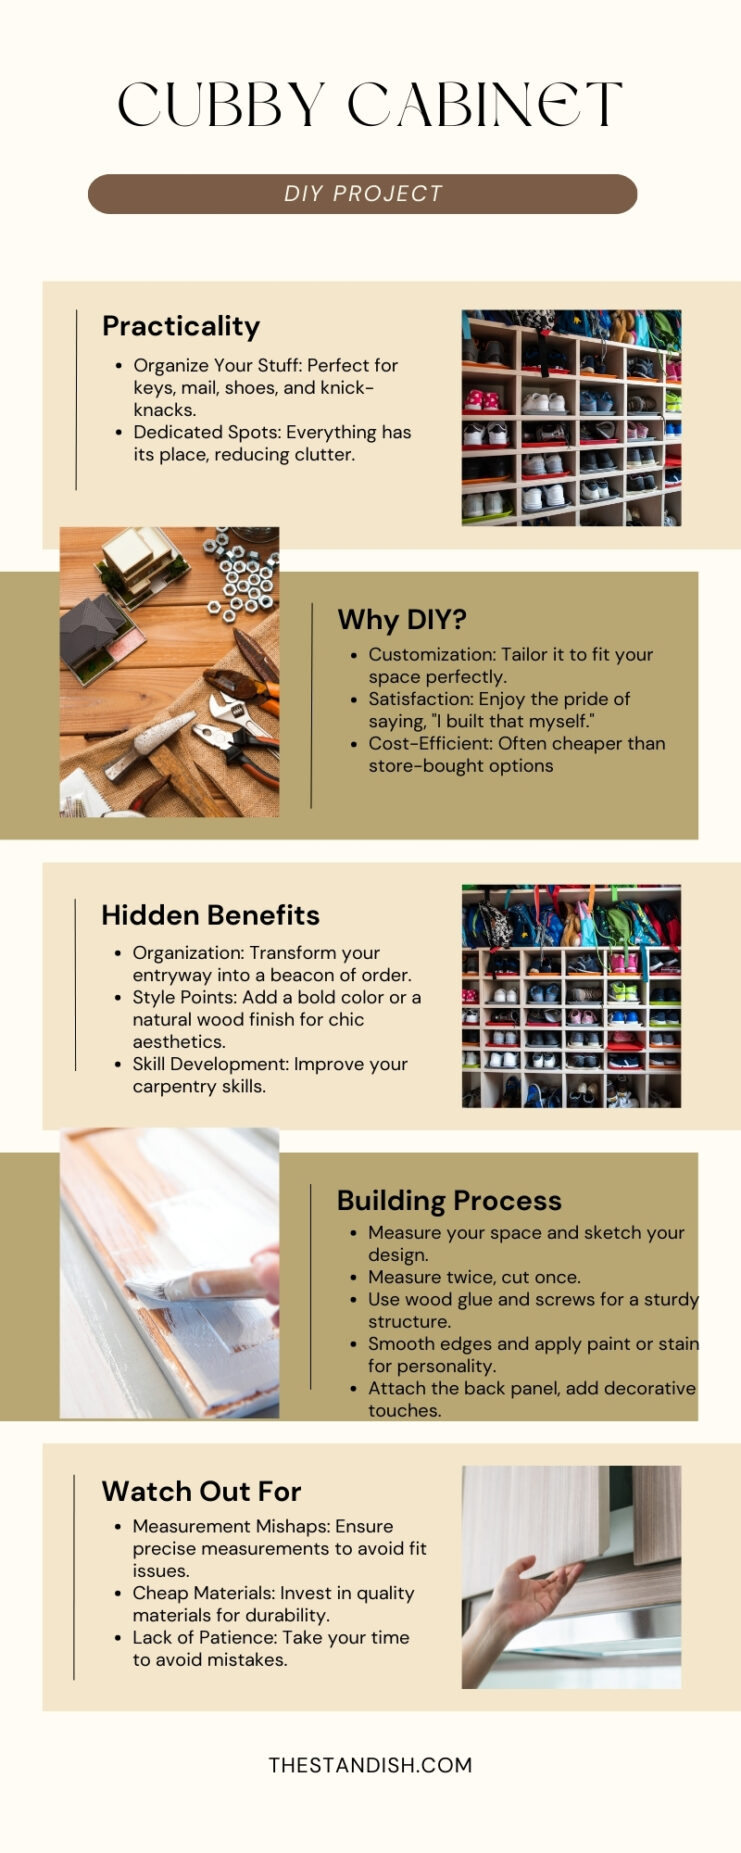
The Practicality of a Cubby Cabinet
Let’s be honest, we all have stuff. Stuff that ends up in piles, drawers, and mysteriously missing just when you need it. Enter the cubby cabinet, your new best friend in the organization.
Imagine having a dedicated spot for everything – keys, mail, shoes, and even that random collection of knick-knacks you swear you’re going to sort through someday.
Should You Bother With This DIY Project?
Yes, because buying pre-made furniture can be pretty expensive, and this is your chance to show some creativity and learn a thing or two along the way. Plus, building your own cubby cabinet has perks:
- Customization: Make it so that it can fit your space perfectly.
- Satisfaction: Nothing beats the smug feeling of telling guests, “Oh, I built that myself.”
- Cost: Often cheaper than buying one of those overpriced, mass-produced ones from a big box store.
The Many Hidden Benefits You’ll Have

Organization
The entryway is often the beacon of order and organization in our otherwise chaotic lives. A little cubby for the shoes, another one for the bags, and a spot to corral all that pesky mail – boom, no more stumbling over discarded kicks or misplacing important documents. These are small victories but significant ones.
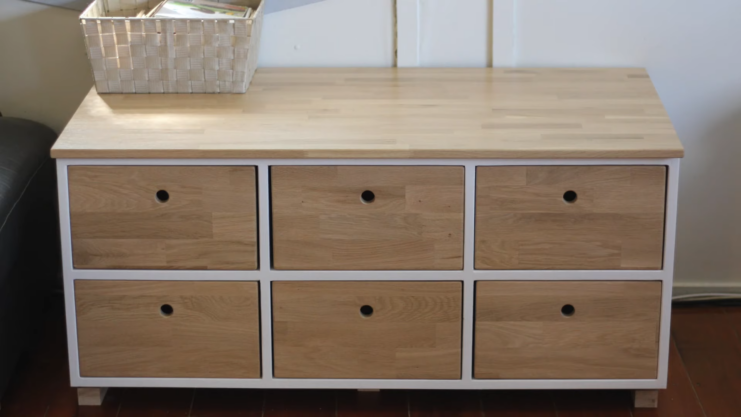
Style Points
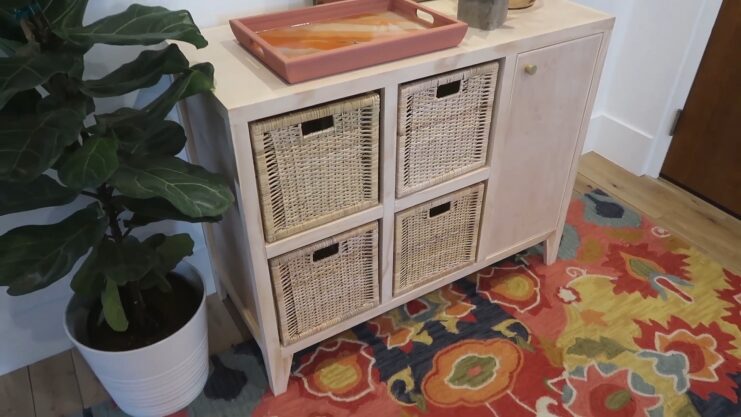
Cubby cabinets can actually be pretty stylish if you ask me. Just slap on a bold, funky color, and there you have it – instant chic. Or, if you’re feeling a bit more subtle, go for a nice natural wood finish.
Throw in some cute baskets or labels, and you get a full-blown statement piece. Personally, I’m a big fan of making the mundane look a little more exciting. Call me crazy, but I believe function and fashion can coexist in perfect harmony.
Skill Development
Most of us aren’t carpenters. Tackling a DIY project like this can boost your skills. You’ll learn how to measure, cut, and assemble. By the end, you might even feel like you’re ready for your own HGTV show. Even if you don’t, you’ll still have a new cabinet, and in my book, that’s good enough.
The Actual Building Process
Materials You’ll Need
Here’s where the rubber meets the road. Grab your materials and tools:
- Plywood or MDF boards
- Screws and nails
- Wood glue
- Paint or stain
- Sandpaper
- Measuring tape
- Saw (table saw, circular saw, or a good old hand saw)
- Drill
Step-by-Step Guide
1. Plan Your Design
First things first, you gotta know the dimensions of the space you’re working with. Bust out the trusty tape measure and get the exact measurements – don’t just eyeball it, that’ll only lead to headaches down the road.
Next up, put on your designer hat and sketch out what you’ve got in mind. How many little cubby holes do you want? What size should they be? Having a solid plan ahead of time is going to save you a ton of time and aggravation later.
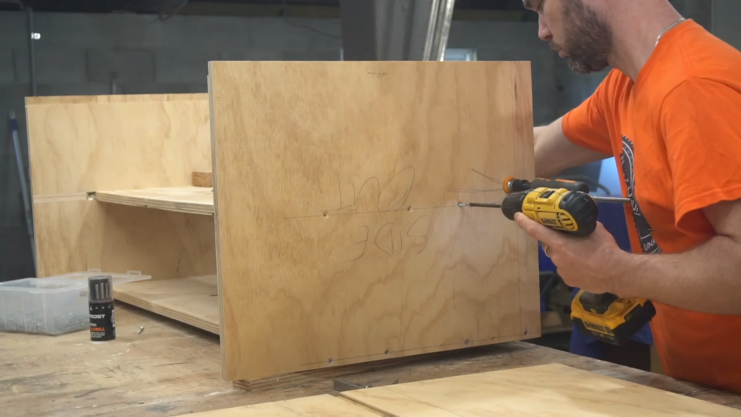
2. Cut Your Pieces
Measure twice, cut once. Trust me, it’s better than having to go back to the hardware store because you’re short a piece. Cut your plywood or MDF into the sides, top, bottom, and shelves.
3. Assemble the Frame
Start with the outer frame. Use wood glue and screws for a solid structure. Then, add the shelves. A right-angle clamp can be a lifesaver here, keeping things square while you secure everything.
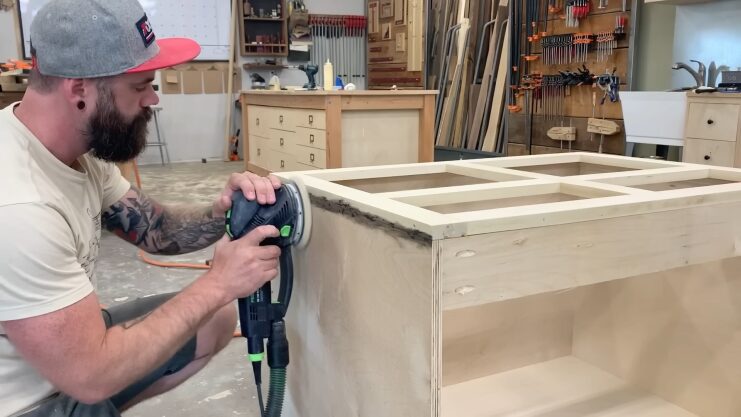
4. Sand and Finish
Now, it’s time to give those rough edges a good sanding. Don’t want to end up with a porcupine for a shoe rack, now do we? Once that’s done, it’s time to get creative with the paint or stain.
It will give this cabinet a little touch of personality. Just be sure to apply it evenly unless you’re going for that “charmingly unfinished” look.
5. Final Assembly
Put it all together. Attach the back panel for extra stability. If you want, add some decorative touches – knobs, hooks, or baskets. Make it yours and unique.
Things to Watch Out For
Measurement Mishaps
Nothing quite kills a project faster than parts that just don’t seem to line up. Guess the old saying “measure twice, cut once” really does hold some weight.
A mere millimeter off can be the difference between a nice, snug fit and an absolute train wreck.
Cheap Materials
Using the cheap, flimsy stuff might save you a couple of bucks upfront, but trust me, you’re not going to be too thrilled when that rickety, low-quality project comes crashing down. Do yourself a favor and ante up for the decent materials.
Lack of Patience
Rushing leads to mistakes. Take your time. If you need a break, take it. Better to finish over a weekend than to end up with something that looks like it was built during a sugar rush.
Final Thoughts
Building a cubby cabinet might seem like a real pain in the neck, but, it’s worth the effort. Not only do you get a piece of furniture that’s tailored to your specific needs, but you also get to brag about your newfound woodworking skills.
And who knows, maybe you’ll even discover a hidden talent – or, at the very least, a hilarious story about that time you decided to play carpenter and ended up with a nasty little cut. So, the next time you look around your place and see nothing but chaos and clutter, think about how much better it could be with a custom-built cubby cabinet.